Thursday, January 19, 2012

"Hey, Mr. Knickerbocker!"

Thankfully, Barney has no place in this house, but when I started working on these knickers for Baby P, I remembered the song from when my sister (now 19) was a toddler and loved Barney and Baby Bop. She even had a Barney birthday party once. She caught a glimpse of the big, purple monstrosity and ran, terrified and shrieking, in the opposite direction...that's a good childhood memory. Anyway...

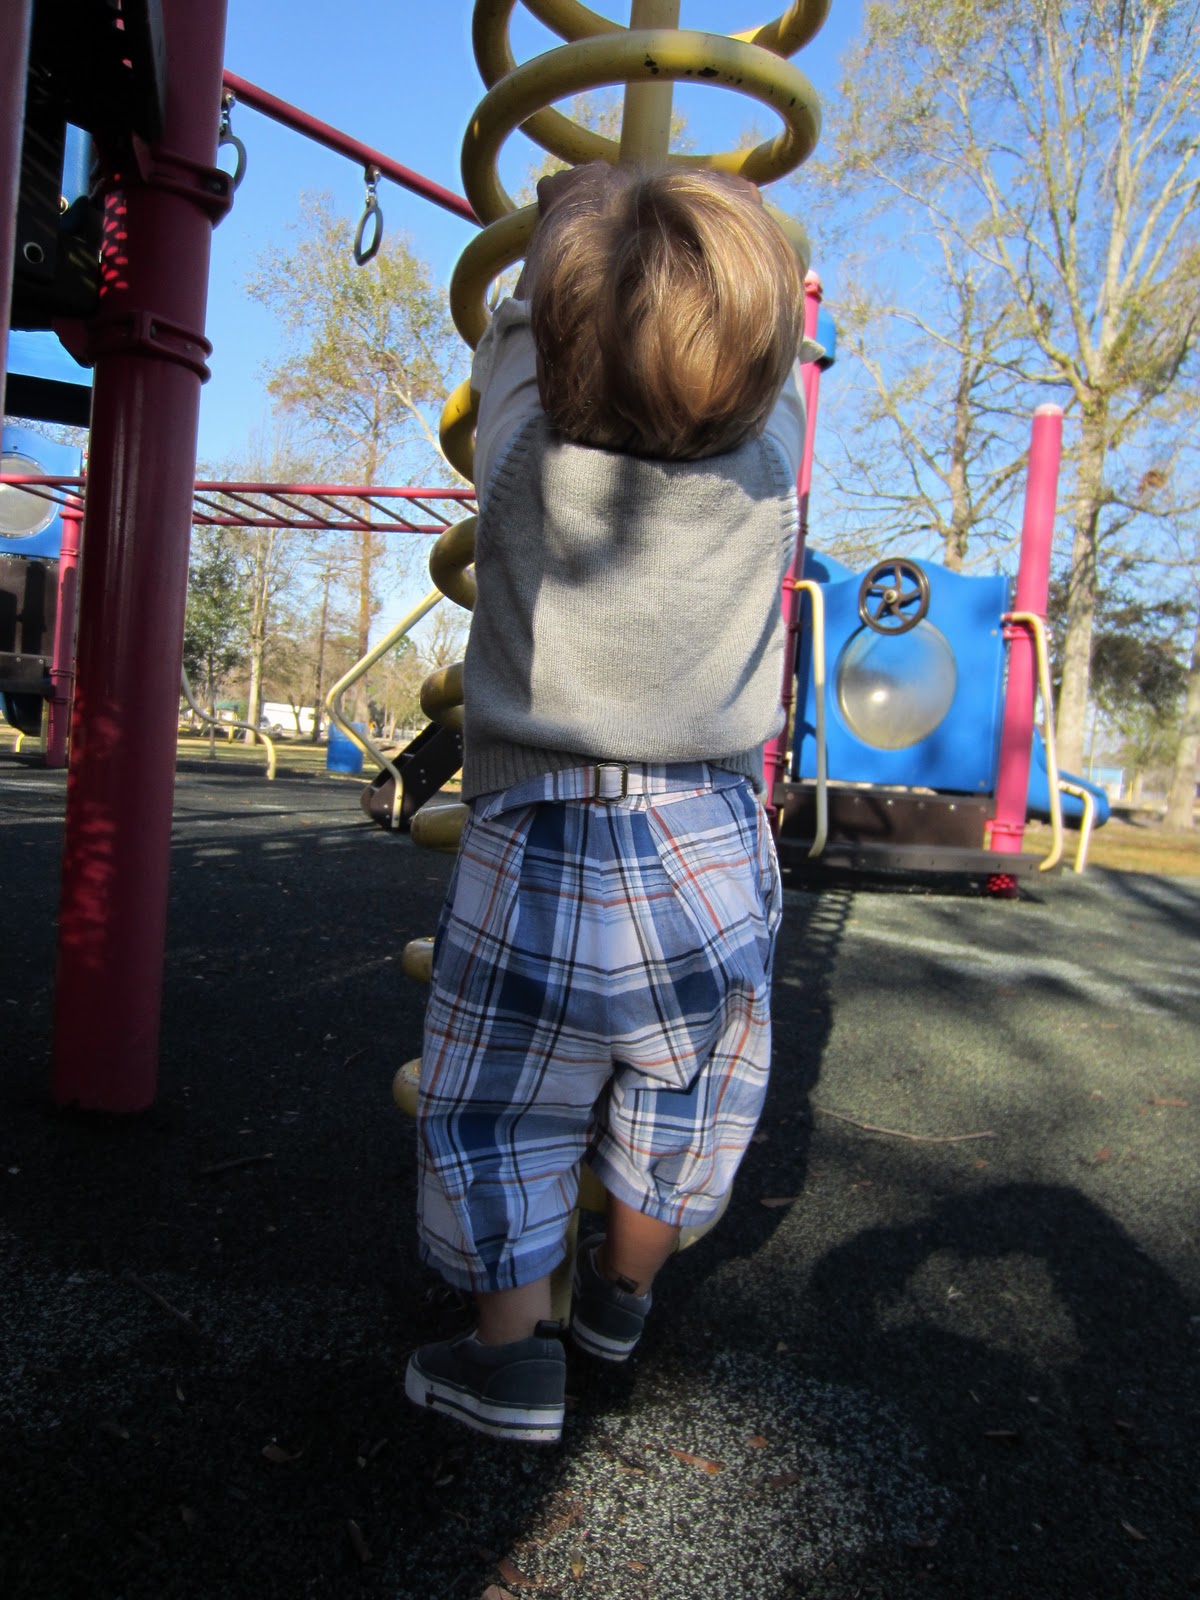
I made P some knickers. I don't know whether to call him "Squirmy" or "Bagger Vance." This little man is hard to catch in one place. He went from angelic to taking off his shoes to riding horsey on the arm of the couch in 2.5 seconds.


The back of these little shorts are pleated and have a strap and buckle to make the waist adjustable. Sort of a paper bag waist, boy style. They definitely have a 1920's or 30's schoolboy feel.


Here's P turning his pockets out, searching in vain for a rock he found on the playground. 


Got it! Yes!

Instead of using elastic around the legs, I did (backwards) box pleats in the middle front and back of the cuff. They're still comfy and with enough ease to do some climbing. I left them a tad on the long side so he can wear them into the spring...although it feels like spring year round here in NOLA. I like the idea of mixing a more modern, casual top with the knickers on bottom.


 This pic doesn't even show the shorts (I did not make the shirt or sweater), but I just couldn't resist those long, long eyelashes! Jealous, Maybelline?1


Blue suckers are 'da bomb" (dot) blogspot (dot) com! 


Oh, this great day is about to get even better!


Wonder of wonders, a train went by. P ran up to the sidewalk and plopped down on the ground to point and say "Oooohhh" and clap.


Bye, bye!


Wednesday, January 18, 2012

Pattern Review: Burda 9990


Burda 9990
Size A (2, 3 4,  5, 6, 7, 8)
Boys pant (three length options) and vest.


Description and My Experience:

I've been needing a good, basic pants pattern for a while. You know, one with pockets, button/zip fly, belt loops, cuffs- all those little details that add interest and an alternative to elastic for boys pants and shorts! These are really simple, classic looking pants and shorts. You could do them in lightweight fabrics for spring and summer or heavier for fall and winter. It would also be pretty simple to make them flat front although I like a little added volume.

I chose the size 2, mid-calf length short. Overall, I liked this pattern and will use it again (with my notes beside me). The instructions are a tad 'underexplained' at times and the cutting lines were a little difficult to follow.  The finishing instructions are ok (more on this in "Things You Should Know"). You need some prior knowledge to finish this garment perfectly on the inside as well as the outside.  I found the illustrations very helpful. This is a pretty simple pattern, the only challenge is the zip fly. I got this pair done (minus the hem) in the space of one nap :), about 2 1/2 hours. Not too bad!


(I left off the belt loops, changed the waist band and cuffs since I'm planning to do something interesting with these shorts...hopefully interesting and not dumb looking :)


Things You Should Know about Burda 9990:
1) You need to be at least an experienced intermediate sewist to navigate this pattern. The instructions on attaching the zipper and figuring out the self-facings are not very helpful unless you have done it before, I'd suggest finding a tutorial online somewhere (or instructions from another pattern) and using that to fill in the gaps.

2) While the finishing on the outside of the garment looks professional, the finishing instructions do leave something to be desired.
A couple of things that stuck out to me:
      -Most patterns remind you to finish the raw edges of self facings before putting
       in zippers or button holes or whatever, this one did not.
      -It would be a good idea to finish the raw edges of the pocket/hip yoke before  
      attaching the front and back pieces of the pant together at side seams. You could  
      probably get away with just pinking these, but I hate seeing a mess of raveling
      threads every time I look inside a garment.

3) When you start cutting, beware!

4) Next time, I want to add topstitching to reinforce my seams on the sides and rise (front and back). That's not included in this pattern and to topstitch the rise youwould have to change the order of the directions a bit.


If you have used this pattern! Leave your comments.

Tuesday, January 17, 2012

Busy...


Even though it's just Tuesday, I've had a busy week so far! I have a couple of Etsy orders to work on and I'm sewing some stuff for P. I will post more tomorrow. Here's a quick phone pic of an applique I'm doing...I love the colors...stinkin' cute.


Sunday, January 15, 2012

Sunday Morning Goodness

I love restful Sunday mornings before church. No TV, no loud music, just family hanging around in the kitchen or living room, maybe reading books or playing with Baby P and talking. I like to make something yummy for breakfast, not always elaborate, just something out of the ordinary.

This morning I had a yen for Eggs Benedict.  ("I'm up to my ears in yens." Rory, Gilmore Girls Season 1) The real kind with poached eggs-something I had heretofore never attempted and real hollandaise-something I am totally wild about.


Let me just tell you, this breakfast was to die for and it only took about 15 minutes. No joke, the sauce is the most time consuming part and it is not bad at all! I used Julia Child's recipes for the hollandaise and the eggs. I always thought these two things were tricky, and I guess if you compare them to rice or frozen pizza, they could be considered tricky. Even so, I have not had a flop batch of sauce when following Julia's detailed instructions, and it is sooo, sooo tasty! Creamy, buttery and tangy all in one.

Hollandaise Tips: If you melt the first, large amount of butter in the microwave, you can do the sauce in one pan. (This is a small thing but it means a lot to me, I'd rather throw a small bowl in the dish washer than handwash two saucepans.) Definitely get the white pepper, it has a totally different taste than black that really compliments the creamy, butteriness. I use bottled lemon juice and I usually half Julia's recipe since there are just the three of us. I use two eggs instead of three and half the butter, it still turns out.

I do suggest halfing the recipe or you will be standing alone over the sink, eating hollandaise with a spoon because it is just too good to throw out. 

This is all merely hypothetical, you understand.


Now for the poached eggs. I was very nervous about this, especially after seeing Julie and Julia where she screams and cries over poached eggs.

While it was reminiscent of chasing a jelly fish around a pan with a spoon, it just was not that bad. I brought the water to a "gentle boil", did the vinegar, used a spoon to make sure the yolk wasn't showing, boiled for 4 minutes and they were great!

They look like weird little alien eggs sitting here in the hot, salted water (as per Julia's instructions), but they tasted great and the yolk was soft but not too runny-I like a little texture difference between my sauce and my egg yolk).

I will live to poach again!


I did the sauce first and kept it warm. While the eggs were poaching, I toasted English muffins, sauteed a little frozen spinach in a tablespoon of butter then just had to throw it all together. (muffin, a little sauce, spinach, egg, sauce, a twist of fresh ground pepper)

It does my heart good to see my baby "Hoarking Down" forkfuls of Eggs Benedict. (Yes, that's a little Ratatouille reference.)


He loved it! A great Sunday morning


Saturday, January 14, 2012

"Sewing For Boys" Follow-Up


I had a couple questions from a loyal reader (my friend H ;) about the Sewing for Boys book that I posted about HERE. A few more facts:

1) This book has contains 24 different patterns! That's a great value, one book, 24 patterns, 24 sets of great directions and tons of new techniques and basics that you'll use again.


2) The clothes featured in this book are wearable and they look like boys clothes-not girly.  Some are really simple (like sweat pants and raglan t's) and some are for special occasions. There are sizes 0-6 for a few things, but most are size 2-7. That's a lot of years to cover in one book! A lot of years when boys are rolling around in the dirt...a lot of ruined clothes needing replacement...

3) I like how the book is organized. It's "A Year in the Life of a Boy." The first four chapters are the four different seasons, with 4 clothing projects in each season-from a great pair of PJ's to swim trunks to a reversible coat to a hooded pullover. Everything has directions for beautiful, professional finishing, but the book is still really practical. The fifth is all fun things: a playmat with a racetrack, a lego carrying kit and more. The last chapter shows you some techniques for recycling old t-shirts: applique to cover up stains, fishing hat, patchwork blanket. Tons of great ideas!

So, if you have any other questions just post a comment! I am going to be working on a super lightweight spring/fall jacket for P using this book so I will post that soon!

If you haven't already, get on over to Project Run and Play to see the great designs for Boys Week!


Friday, January 13, 2012

Recipe for Cutting a Toddler's Hair

Ingredients:

Four dum-dum suckers: One per grubby little fist (x 2)

One episode of Sesame Street

One high chair with five point harness

2-4 Hands

One sharp pair of scissors

Lots of agility to keep tiny fingers and/or dum-dum suckers away from aforementioned scissors
      -I recommend an intensive training regimen in preparation. (i.e. hot potato,
       Dutch Blitz, Scrabble slam)

One well-rested toddler

More than a few pinches of patience

Optional:
Haircutting Skill

Thursday, January 12, 2012

"FFF..."

Just in case you were wondering, the subject of this post is not meant to be suggestive of a curse word. Hee hee. It's an imitation of Baby P.

He has started mimicking us a lot more lately: trying to put Q-tips in his ears (Yes, scary, and yes, those have now moved to an out of reach location.), trying to put on his own socks (totally adorable), trying to operate the DVD player (much to my dismay) and lately blowing his nose and blowing on hot food.


Problem is, he hasn't figured it out completely so he holds a tissue up to his nose and goes "Ffffffff" through his lips.


Here he is eating some of my (yummy, if I do say so myself) homemade chicken noodle soup. He LOVES chicken noodle soup, the whole time he's eating it he says "MMM, num num," it is quite gratifying. In between bites, he holds a noodle to his mouth and "blows" on it with a "Fffff." Too cute. He looks at us, all proud of himself because he's accomplished a perceived grown-up thing.

Here he is smelling it...


Mmmm...Num, num...


Fffffff....


He did something grown-up yesterday too! He's finally figured out not to eat the markers and crayons.


That picture may or may not be on my refrigerator...