 |
| Free People |
 |
| Free People Rodeo Shorts |
Cute right!? Some have a panel in the front and also a contrasting strip on the back yoke. My sister asked me to make a pair for her out of some cast off jeans so I thought I'd take some photos and share. It was a pretty quick project, here's how:
You Need:
Shorts (hemmed or frayed)
small pieces of fabric (cotton, knit, poly, etc... just be sure that it can take a little heat)
small pieces of Pellon "Wonder Web" (this is great stuff, it's over by the interfacing)
matching thread, scissors, iron, denim needle, stitch ripper, etc...
The Steps:
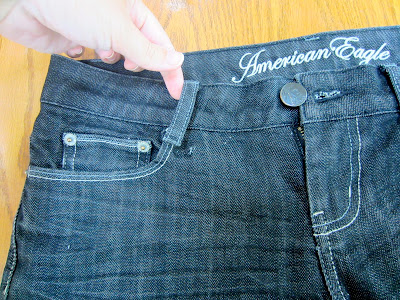
1) Start by using a stitch ripper to remove stitches from the bottom of the belt loops (I did all of them so that I could sew them back on with black thread instead of taupe, just a time saver :)
2) Use the wonder web to create a template for each of the fabric pieces. Cut them so that they fit perfectly within the area you want to cover with fabric. We will add some allowance for hems in the next step. (You can see here I started with two separate pieces in the back but that really wasn't necessary)
3) Lay the wonder web on your fabric of choice; using it as a template, cut around the pieces adding a 1/4 " hem allowance on all sides.
4) Head to the ironing board and pin wonder web to the wrong side of the newly cut pattern pieces. Snip corners off diagonally to reduce bulk then begin folding the fabric around the wonder web and pressing it down with a hot iron. (See photos) Avoid touching the web with your iron or you'll have a sticky mess.
Snip wherever necessary to manipulate the fabric around the "wonder web template." The center bottom of the yoke (below) needs a snip to keep the correct angle and make a row of snips around the curve of the pocket for the front panel.
5) When you're finished pressing, pin the pieces to the shorts. Use lots of pins and be prepared to pull and tuck so that the pieces fit correctly. (WAIT UNTIL AFTER SEWING TO PRESS, that gives you the chance to shift the fabric around and avoid weird wrinkles.)
6) Sewing with matching thread, stitch as close to the edge of the fabric as possible, smoothing as you go and keeping the belt loops out of the way.
7) After you finish stitching, press the shorts, heating wonder web and fusing the fabric even more securely to the shorts.
8) Last step! Sew the belt loops back in place. Done! A trendy, easy, upcycle!
As soon as I get one, I'll add a picture of my sis modeling these! I would have tried them on myself...but...the effect (considering my 7 month pregnant belly) wouldn't have been exactly the same :).
By the way, this fabric is a $1/yd remnant from Hancocks. It feels like rayon but is probably some other kind of cotton/poly blend because it ironed just fine. I think the light weight helped keep these shorts from feeling too bulky.


No comments:
Post a Comment