
A couple of weeks ago I posted about a travel jewelry case that I made, thinking it would be a fabulous gift. I even mentioned a tutorial. Well here it is!!
The Roll-it-up and Go Jewelry Case!
Here's what you need:

(Two or Three different fabrics, you could edge the roll up with the same fabric as your pocket lining)
1) Main Print
1, 8" by 12" rectangle (outside)
1, 8" by 8.5" rectangle (inside top)
1, 8" by 4.5" rectangle (inside bottom, front of pouch)
2) Second Print (lining for pocket, ring holder and bias tape around earring mesh)
1, 8" by 4.5" rectangle (front pouch lining)
1, 8" by 5" rectangle (back pouch lining)
1, 7" by 2" strip
21 inches of double fold bias tape (make your own or use pre-made)
3) Third Print (could use Second Print if you want)
42 inches of double fold bias tape, just over a yard
I used this for the entire outside edge of the pouch.
4) Zipper: 8" or longer
5) Medium Weight Fusible interfacing
6) Fusible fleece
7) 1 Piece of ribbon, twill tape or fabric for ties (about 30 inches long)
8) one 5.5" by 3.5 " piece of plastic mesh or screen (try a hardware or home supply store, mine is leftover from when my husband screened in our gazebo)
8) 2 Snaps, sew on or with snap setter
9) Thread, scissors, pins, sewing machine, all "les accoutrements" of sewing :)


Prepping the Fabric:
Cut out all your pieces and iron the fleece to the large rectangle (this will be the outside of the roll-up). Iron the fusible interfacing to the 8 x 12" and 8 x 8.5" pieces (this will be the inside). If you are using a thin fabric (like the brown floral print that I chose) you may also want to add fusible interfacing to the 2 x 7 inch piece for the ring holder.
While at the ironing board, go ahead and make your bias tape (if you are making your own). Also, take the 2 x 7 inch strip, iron the edges to the inside, fold in the corners, then fold the entire piece in half, and press. (See above)
Constructing the Earring Screen:
Now prepare to attach bias tape to your earring screen. Begin pinning in the center of one of the long ends, when you reach the first corner, make a mark or stick a pin through the fabric at the corner. Unfold the edges of the bias tape, then fold horizontally, right sides together with the "corner pin/mark" at the top of the fold.

With a disappearing marker draw a zig-zag line like this on the fabric (the point should be exactly where you want the fabric to surround screen corner).

Stitch on your line. Snip out the small triangles.

Flip right side out, the seam to the inside and VOILA! Corner!
Continue to pin, stopping at the corners to do the zig zag shape. Be sure to do one corner at a time so that it will fit correctly at the end. When you reach the end, unfold the bias tape, pin right sides together at a right angle (see picture below), sew, cut off excess, and press seam open (carefully not melting your screen). Never cut off the excess until you make sure that you sewed the seam correctly, I can't tell you the number of times I have had to cut a new piece of bias tape because I sewed right side to wrong side and cut of the excess (making it too short).
If you're unfamiliar with bias tape and this isn't making sense. Check out Dana's Tutorial over at Made. It is great!


If you haven't already, pin the bias tape in place, all the way around the screen. Stitch first around the inner edge of the tape, then the outside edge.
Pin the pressed and folded ring holder strip then sew. The ring holder really only needs stitching up the open edge and the ends, but I edge stitched all the way around then one seam up the middle. It makes it feel a little more sturdy. Set these two pieces aside.
Pin the pressed and folded ring holder strip then sew. The ring holder really only needs stitching up the open edge and the ends, but I edge stitched all the way around then one seam up the middle. It makes it feel a little more sturdy. Set these two pieces aside.
Gather the two inside pieces of the roll up, the zipper, and the two pocket lining pieces.

Sandwich your larger inside rectangle, zipper (face down with the zip pull on the left), then the 8 x 5" lining piece. Right sides should be facing the zipper. My lining doesn't have a wrong side so ignore that. Pin securely. Sew close to the zipper using a zipper foot. Turn wrong sides together, revealing the other side of the zipper.

Now, sandwich the smaller inside rectangle, zipper, and the smaller pocket lining piece (right sides facing zipper). Pin, sew using zipper foot, turn wrong sides together.

And you're left with this on one side and...

And like this on the other side.

Now for the topstitching around the zipper. Get the back lining (the larger pocket lining piece) out of the way and, using a regular foot, topstitch close to the zipper (through the front and through the lining).
Here's what it will look like on the inside (with the larger lining piece still out of the way.)

Now for the other side of the zipper, fold the lining down and topstitch close to the zipper and through the front and the lining.
Here's what it will look like on the back after sewing.

And here's the front.

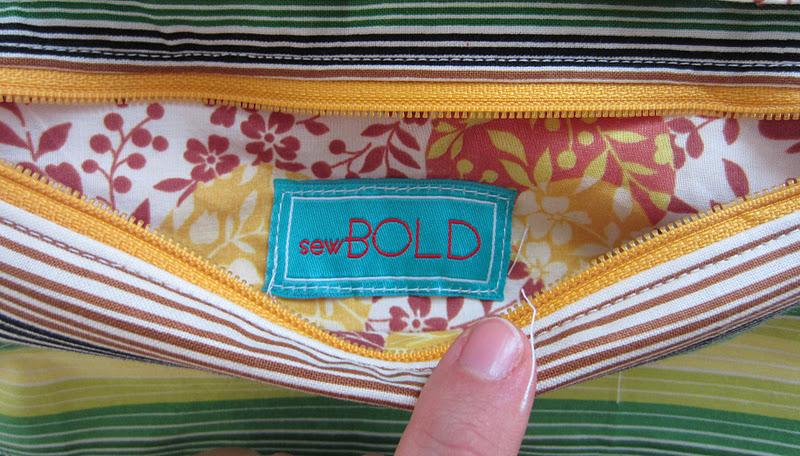
Now is the time to sew a label to the inside back of the pocket lining if you want to do so.
Attaching the Earring Screen and Ring Holder:
We're getting close to the end! Find the earring screen and ring holder that we put to the side earlier. Attach the "bulbous" end of a snap to one end of the ring strip and to the center top of the earring screen. Then place and pin the ring strip about an inch and half above the zipper (centered). Center and pin the earring screen about three inches from the top. The placement is not "set in stone," but if you use my approximate recommendations you the roll-up will fold just above the zipper then the top will fold down just above the earring screen and look proportionate when it's all tied and ready to travel.


Now sew (back and forward stitching securely) the right end of the ring holder to the jewelry roll-up (just vertically across the end so that it's free to lift up and to hold rings :). Also, sew horizontally across the bottom of the earring screen, I tried to sew right on top of the line I had already edgestitched so it wouldn't look messy!
Keep the screen and ring holder pinned to the background fabric and flip the whole piece over. Feel for the bulges where the snaps are and make a mark. Use this to guide you as you attach the recieving end of the snap.


Finishing:
Now grab the large, fleece backed rectangle, sandwich it with your almost completed inside piece, wrong sides together. Line up the raw edges, use lots of pins and then go around and trim anything that's needed. Cut off the extra length of zipper, little bit of extra pocket lining, etc...
Now grab the large, fleece backed rectangle, sandwich it with your almost completed inside piece, wrong sides together. Line up the raw edges, use lots of pins and then go around and trim anything that's needed. Cut off the extra length of zipper, little bit of extra pocket lining, etc...
Here you can either leave your corners square (and use the zig-zag method to corner up the bias tape) or you can trace a little curve like I did. Just trace the edge of a glass or something with a disappearing marker and trim. Next sew a basting stitch all the way around the edge, keeping the layers in place in preparation for the last few steps!

Curved corners and basted.

This step is optional, but I think it makes the snaps more sturdy and ready for a bit of tugging. Go back to your zipper foot and sew a sqare, as close to the snap socket as possible, through all thicknesses (for the earring screen and ring holder). You'll see the stitches on the outside of the roll-up, but I like the way it looks.


Last step!! You can try to sew your bias tape on in the cheating way (sandwich'ing, pinning and sewing through all thicknesses at once), but I tried that on my first attempt at this roll up and it was not vert successful. If you are using storebought bias tape it might work.
So we are going to sew it on the professional way. Unfold one side of the bias tape, pin it all the way around starting at the bottom middle (either side is fine, I did this step on the outside). When you reach the bottom middle, pin right sides of the unfolded bias tape together at a right angle, stitch, trim off excess and press. Finish pinning then stitch all the way around, in the crease of the unfolded fold (sorry :).

When that's done, refold the bias tape around the raw edges of the roll-up, pin in place and topstitch through all thicknesses. It would look nice to edgestitch as well, I may add that later.

Last step! Grab the ribbon or twill tape for the tie. Fold over each end twice (about a half an inch per fold) and stitch in a rectangle.


Roll up the Roll-Up and center the tie, pin in place and stitch through all layers (this will be sewn behind the earring screen so flip that out of the way) in a square with an x in the middle.

It's done!! Now you can roll it up and...tie it. Ha!

You can tie it in a knot or you can tie it in a bow. You can throw it o'er your shoulder...oops
I'll stop there.
I'll stop there.


This tutorial is for personal use only. If you are interested in buying permission for limited production, please contact me.
P.S. If you make one of these I would love to see comments or pictures!
P.S. If you make one of these I would love to see comments or pictures!
Fantastic tutorial, thanks for sharing!
ReplyDelete